
I am currently working on a newborn fisherman outfit/photo prop and thought that I should show what I am doing, as I go. I love the magic circle and use it anytime I can! It is my favorite way to start a project, especially hats. 🙂 The reason that I prefer magic circles to other methods is because it is very adjustable. You can make the circle as large or as small as you would like and can use it with any stitch. For example, in my fisherman pattern, I use the magic circle to start my hat, little fish, fishing pole, bobber, and my fishing reel! Of course this method only works, if you are working into the circle, which is why my next post will be about starting with a foundation double crochet (FDC), for my little fisherman pants and suspenders.
The magic circle, (MC) sometimes called the magic ring, can be started several ways. This is just the way that works best for me. You are essentially creating a slip knot that you work into.
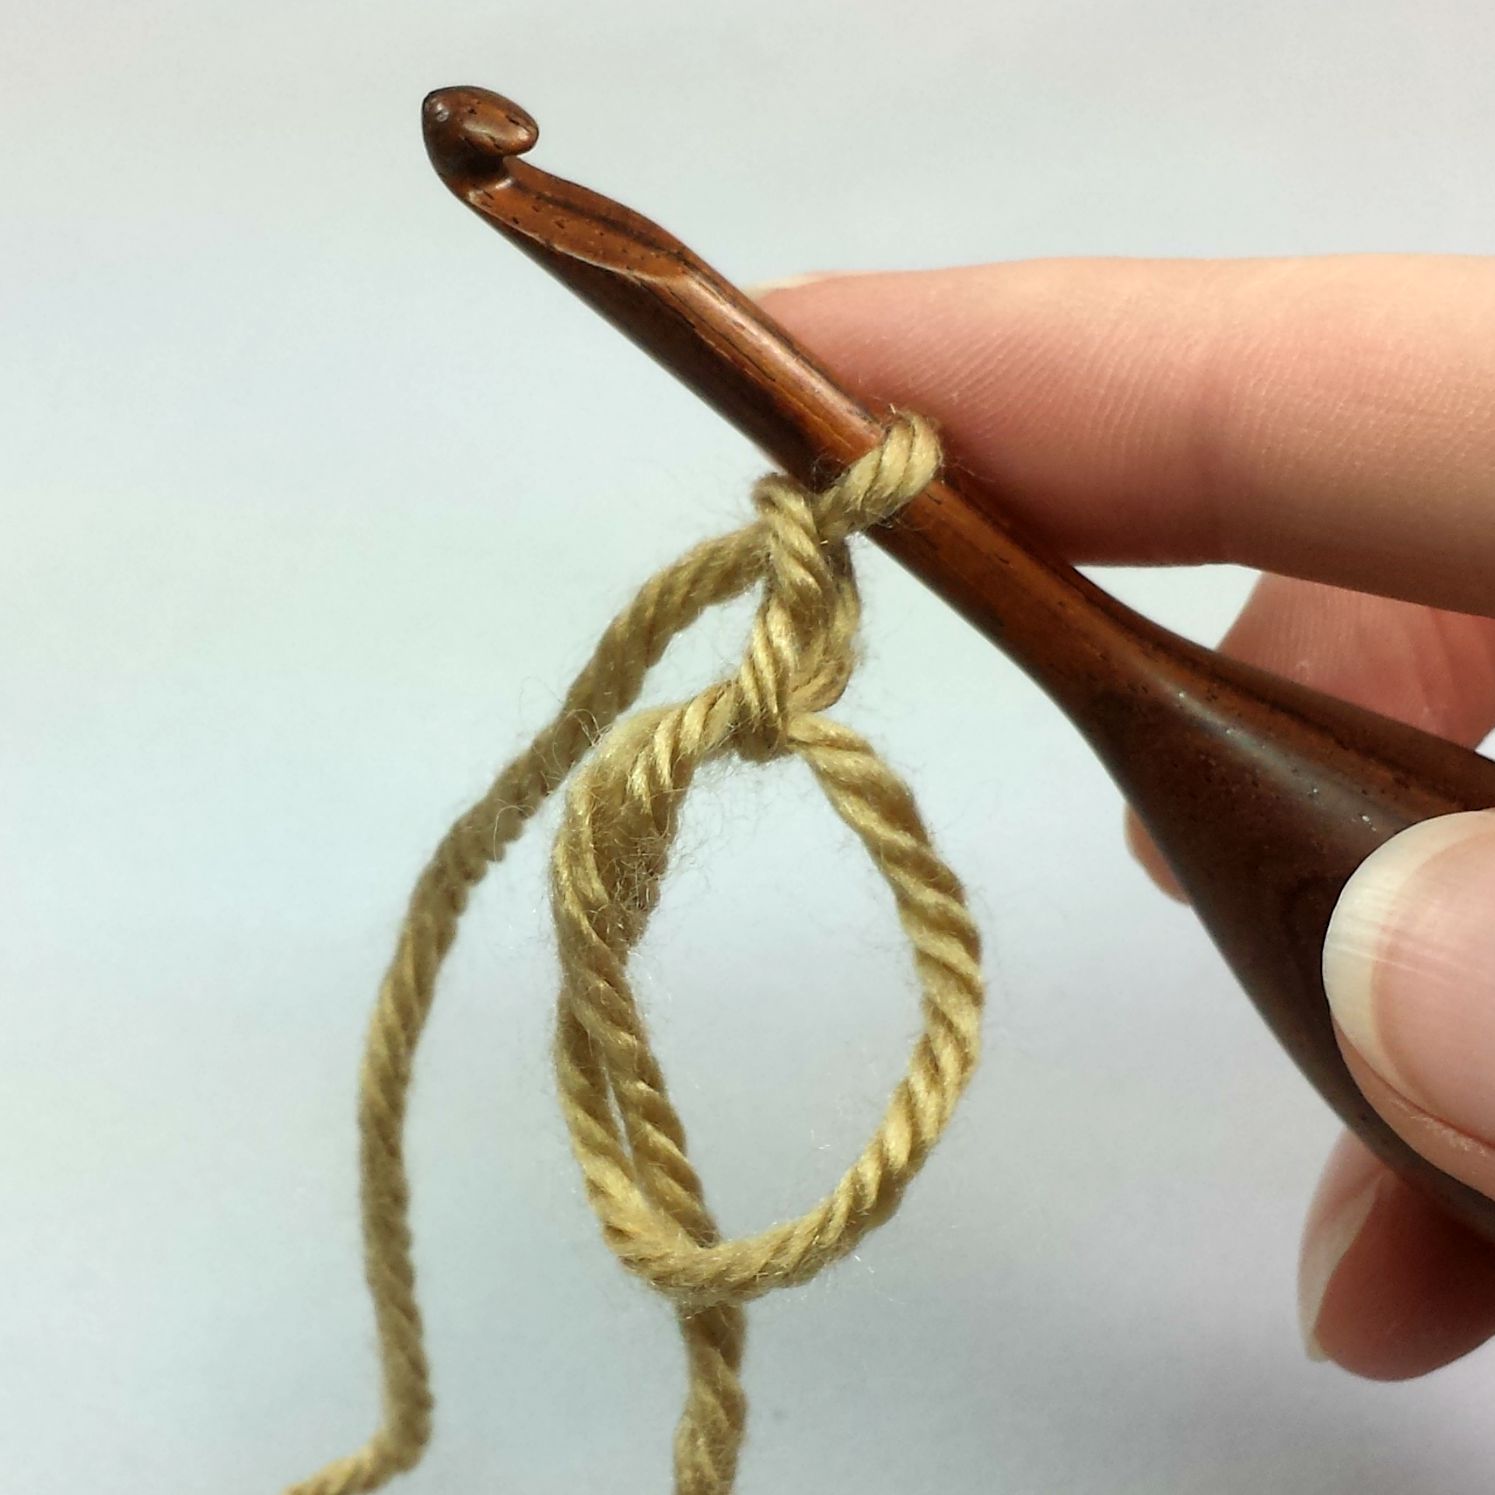
Start with the tail of the yarn in your hand, wrap the yarn around two fingers and cross over the tail. Holding the tail with your thumb, turn your hand over. Using your crochet hook, go under the first strand (tail) and grab the second strand (working yarn), pulling it under and through the first one (tail).


I find it easier to chain one, while the magic circle is still on my finger. Pull the magic circle off you fingers and you have an adjustable ring! Depending on the pattern, you can have two or three chains to start, for double crochet (DC). For my hats, I only chain two.


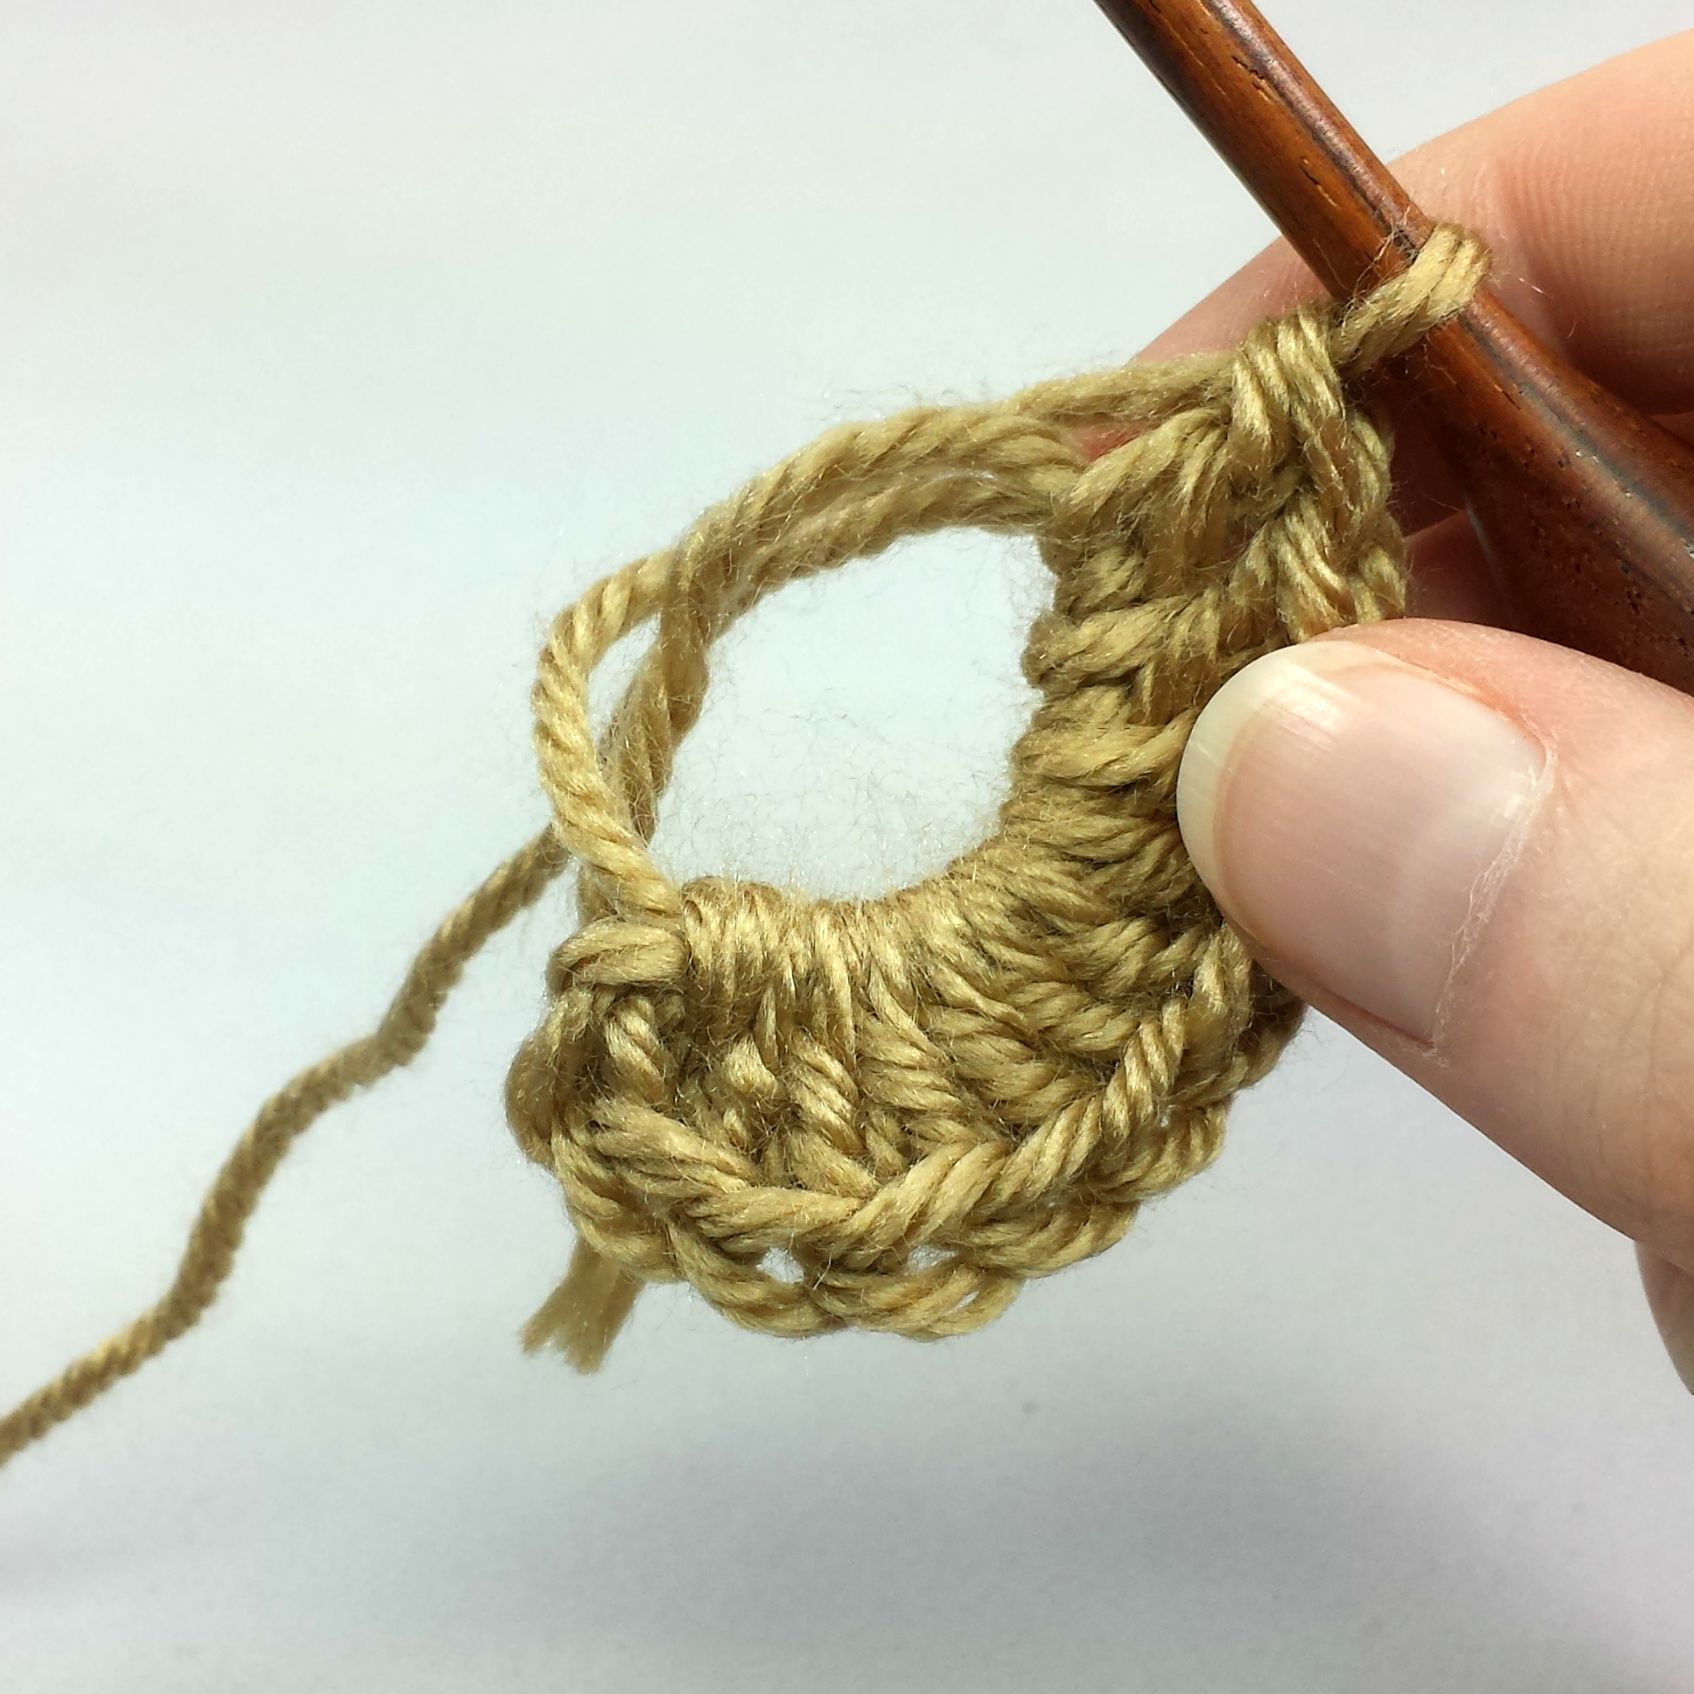
Double crochet into the ring, over both of the strands of yarn. Do as many as your pattern calls for. I typically start my hats with 9 or 11 DC. Pictured here is 11 DC. To tighten your circle, all you have to do is pull the tail yarn tightly. Now you can join to the first DC with a slip stitch (SLST) and continue on with your hat/project.

For those that are making a DC hat, I thought I would add in how I keep my seam straight. There are several methods for how to make a hat, but this is what I like.
Now that I have the MC completed, I chain (ch) 2 and work my first DC into the stitch that I joined to. I do not count the ch 2 as a stitch. For my hat pattern I do 2 DC into each st around, so I end up with 22 DC stitches at the end of round 2, just depends on the pattern you have.
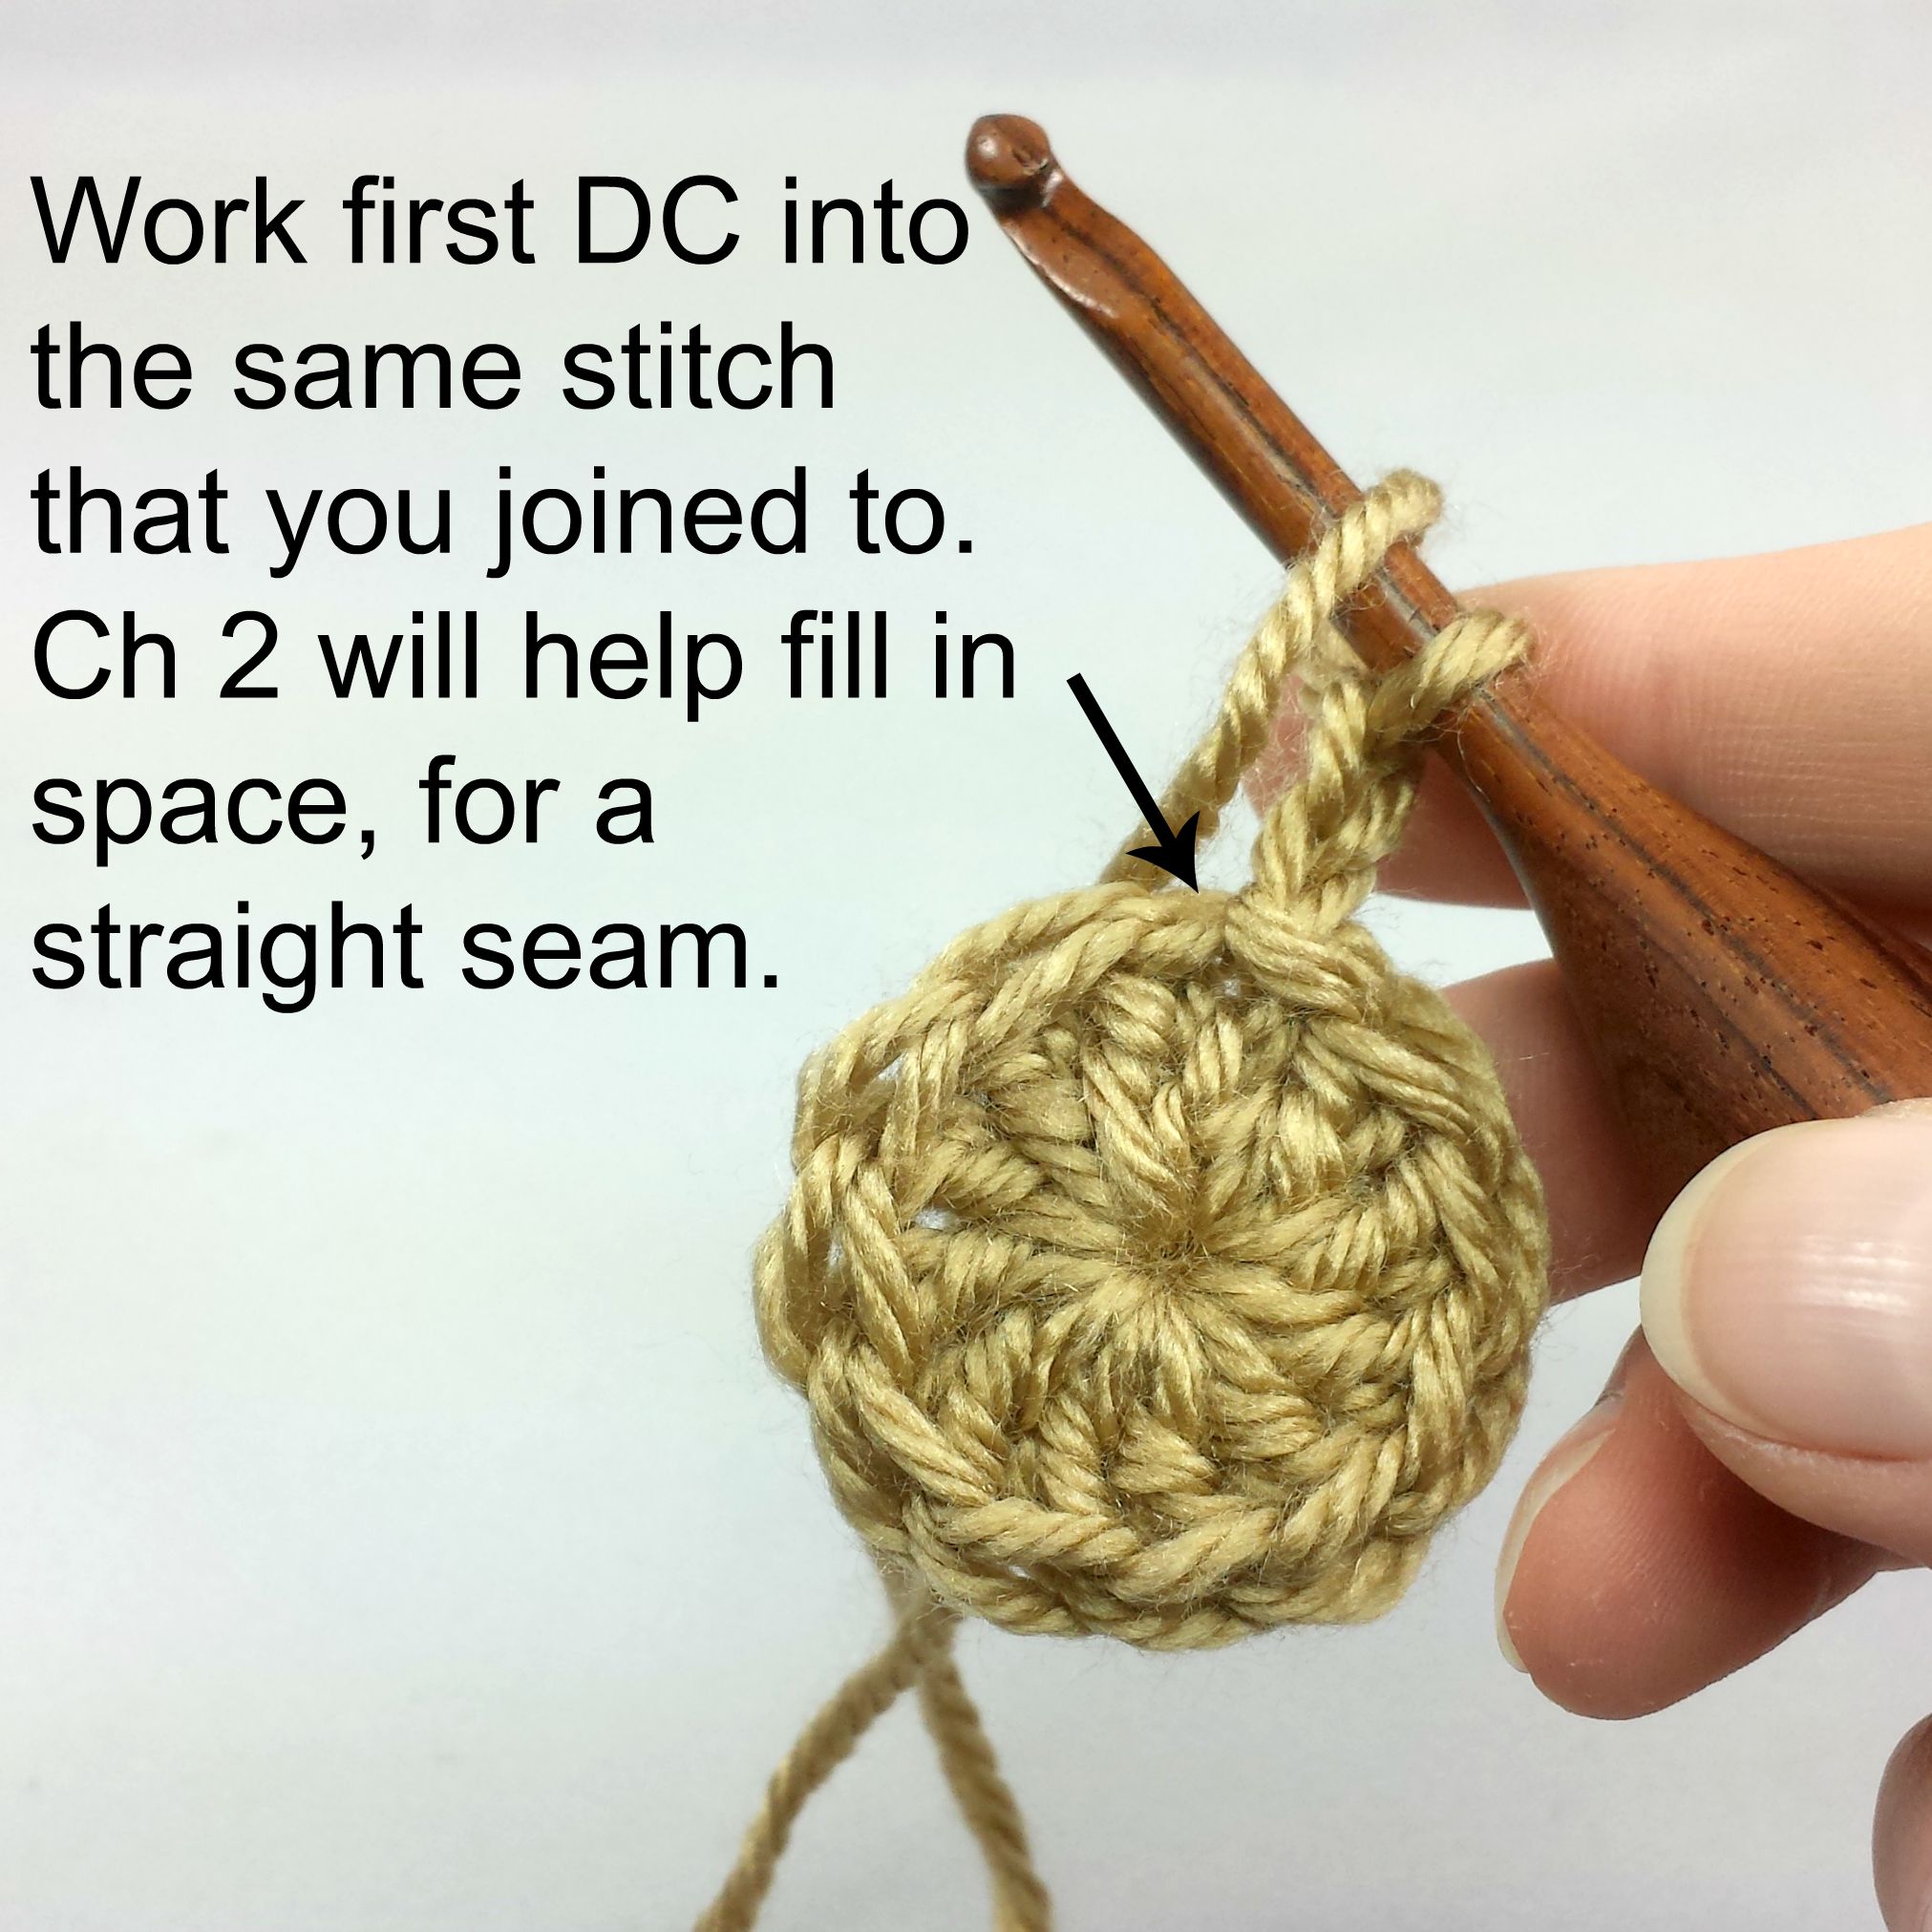

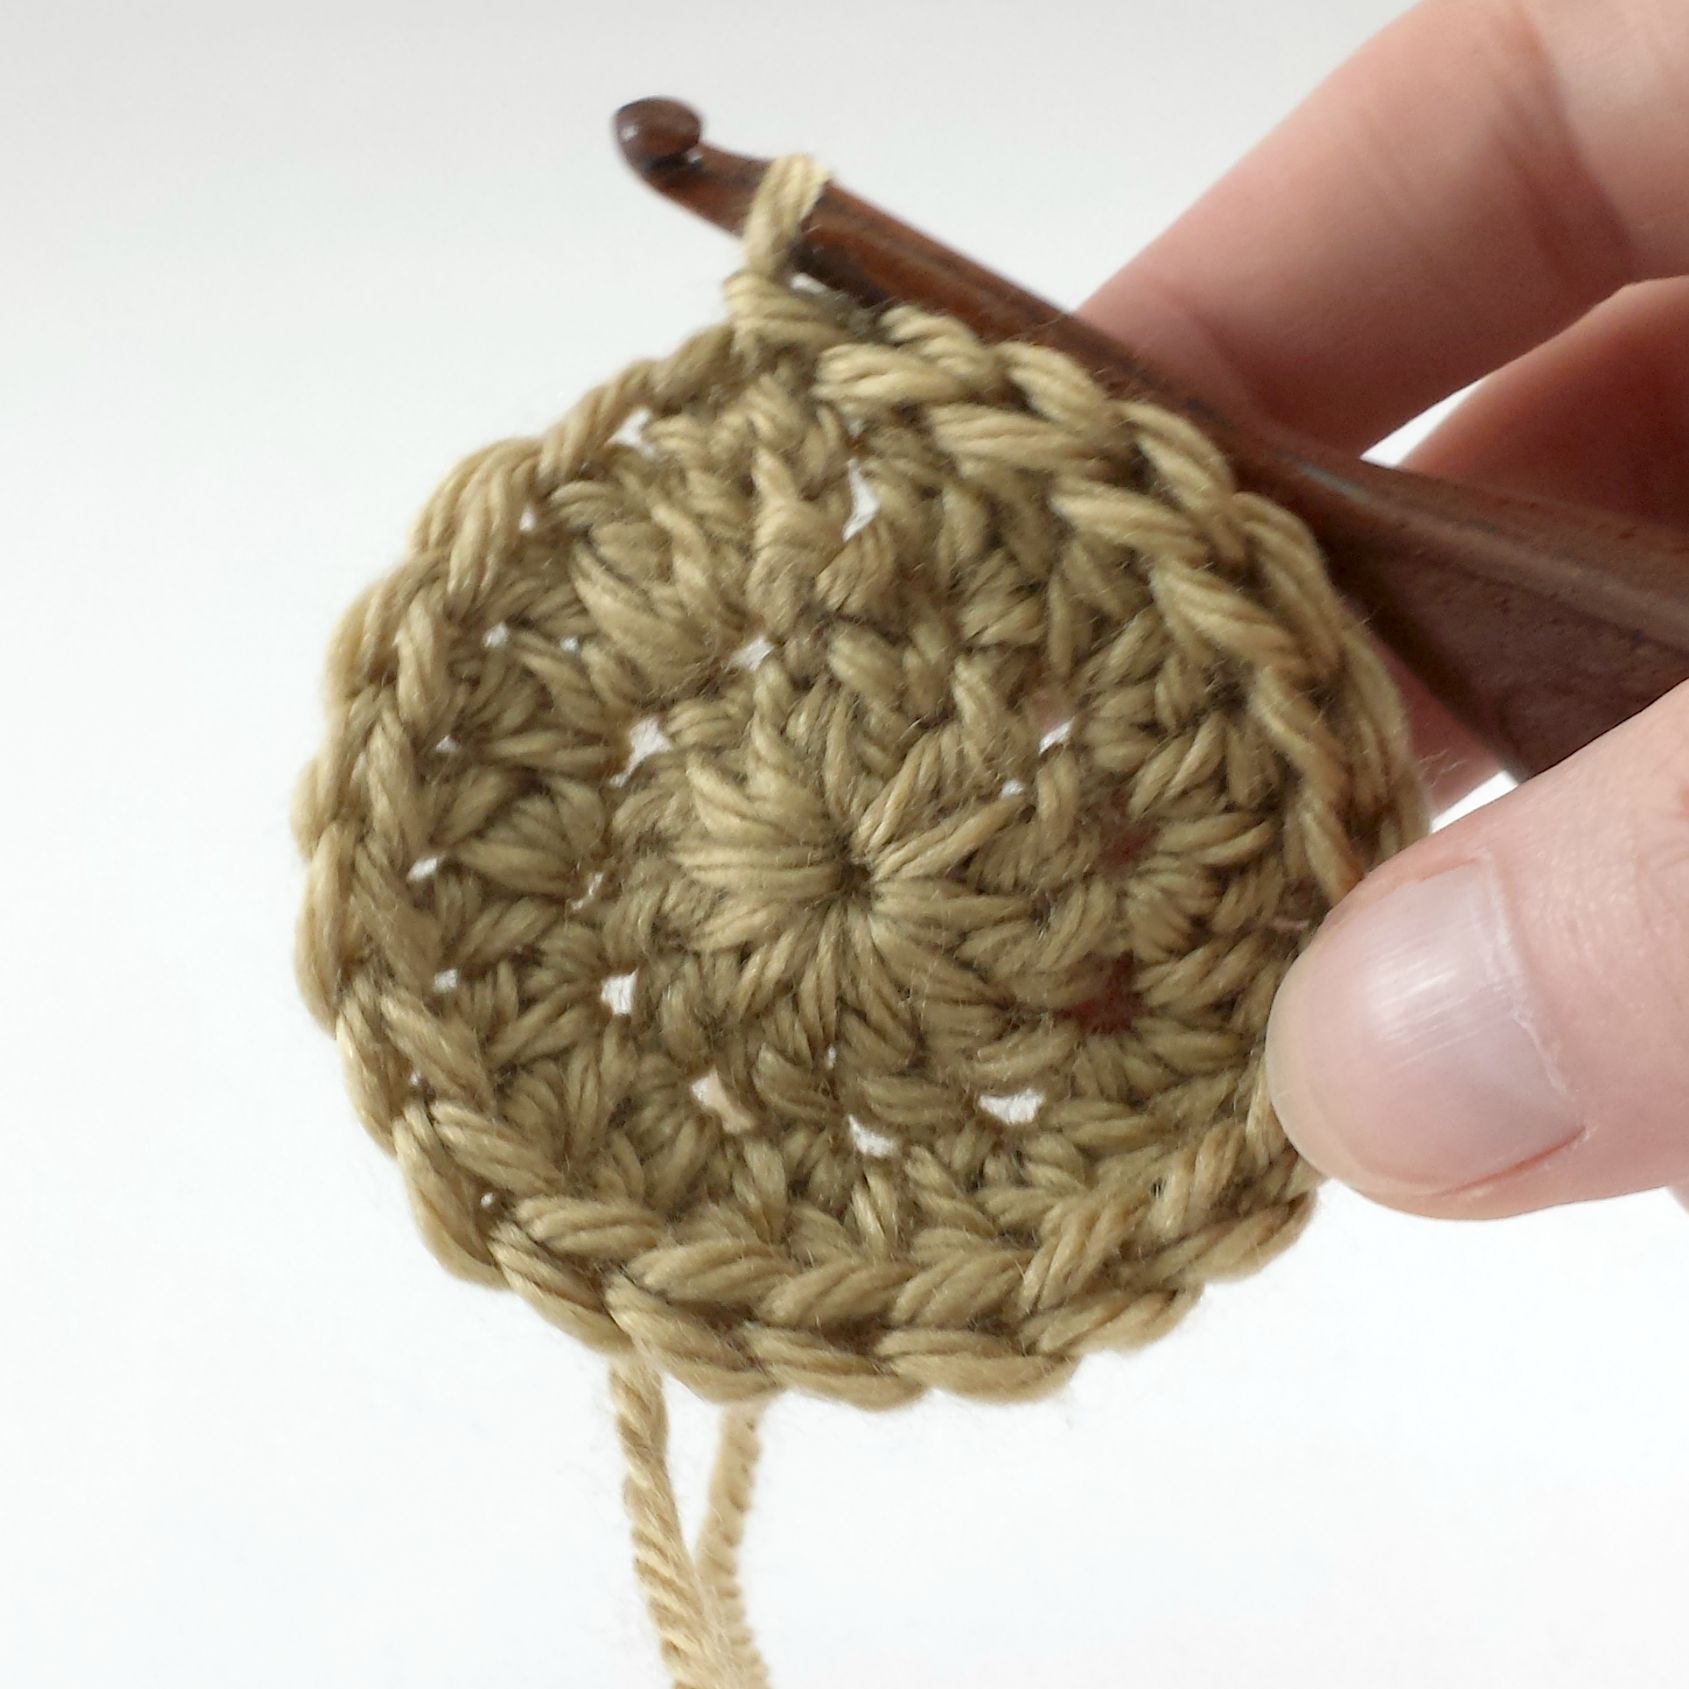
When I finish the round, I join to the first DC, with a slip stitch (SLST). That finishes round two and I continue to use this method each round, so my seam will stay straighter. (Ch 2, work first DC into same stitch that you joined to, and join to first DC)


I really hope that you found this helpful and would love to hear that you think! Feel free to share, in the comments, how you create the magic circle/start hats or keep your seam straight!
I will be posting a free newborn bear hat pattern soon, that uses the magic circle, with worsted weight yarn and another with bulky weight Pipsqueak yarn.
Thank you for reading!
Here is the PDF copy of how to make magic circle. MagicCircle

[…] To see how to start with the MC, please click here: Create Magic Circle . […]
LikeLike
[…] With worsted weight yarn and “H” hook, or hook used to get correct gauge. To see how to start with the MC and keeps your seam straight, please click here: Create Magic Circle . […]
LikeLike
[…] MC: magic circle – Photo Tutorial Here […]
LikeLike